Using oils to cleanse oily, congested skin. Sounds a little bit like rubbing soil into your jeans to get the grass stains out right? Dubious? I was slightly confused about this cleansing method too, so I set out to find out just why oil cleansing not only works, but has plenty of devotees the world over. Firstly: not all oils are created equal. In my head, ‘oil’ could mean anything from the contents of the vat my fish supper was fried in to the contents of the sump in my car. It’s certainly a broad definition: an oil is a hydrophobic substance that is usually liquid at room temperature. Although it will not mix with water, it blends easily with other oils. Oil can come from animals, plants or chemical processes. Also, it comes from our skin!

Having been exposed to decades of marketing intended to encourage me to buy harsh astringent chemical products, I’ve been wary of embracing my skin’s natural oils. Don’t they cause breakouts? Well, the short answer is no! Our skin has evolved to take care of itself perfectly well. The oils it makes are what keep it hydrated, help to heal minor wounds and keep infections at bay. The problem with this harmonious system comes when we expose our skin to environmental factors that disrupt this balance, such as polluted air, makeup or chemical irritants. If skin isn’t properly cleansed, these beneficial natural oils can clog our pores and when trapped lead to blackheads, blemishes, and unhappy skin.

Using harsh chemical cleansers will strip the oils from your skin. It’s true! They will! But they will strip all the good away along with the bad, and can lead to irritations, rashes, dryness and …you guessed it… unhappy skin.

But what if we were to use a natural oil, with antibacterial properties, that was similar in consistency and chemical make up to the sebum made by our own skins? Well, the oil cleanser gently mixes with – and lifts out – dirt and oil from your pores, leaving them cleansed without drying, working in harmony with your skin’s own amazing self-regenerative properties.

apricots ripe on the tree

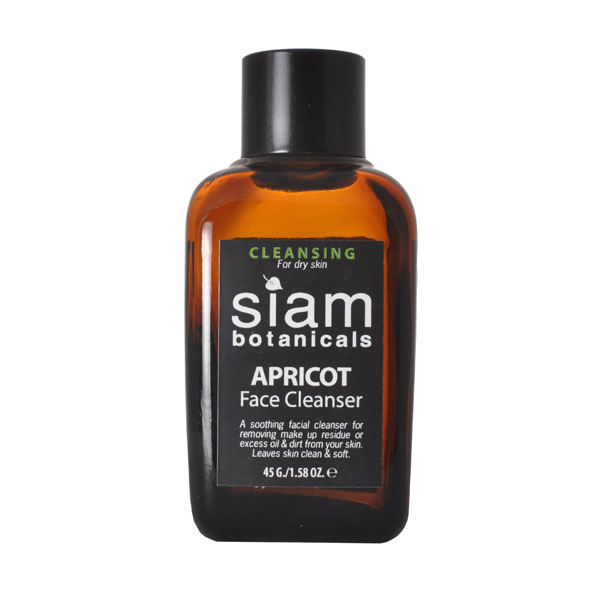
Apricot kernel oil is rich in essential fatty acids, and a sustainable by-product

Siam Botanicals’ COSMOS Organic Apricot Facial Cleansing oil has been carefully blended with oils of castor seed, sweet almond, apricot kernel and black caraway seed. Used daily in conjuction with a face cloth and hot water, this oil cleanser will care for oily skin, removing impurities and congestion without upsetting the skin’s delicate balance. Simply massage the cleanser into dry skin (no eye make-up remover required either) and then soak your face cloth in hot water, drape over your face and allow your pores to open. Then simply wipe away: the cleanser, impurities, stress and makeup. Intended to be used before bed: the added bonus being that a quick splash of warm water is all that’s required in the mornings!

Castor seed oil is a key ingredient: it has been traditionally recognised for its antiseptic and astringent properties. Although it feels quite a heavy oil in the hand, it’s actually very similar to the skin’s own oils and as a result is a highly effective deep cleanser.

Siam Botanicals Rosehip and teatree oil cleanser

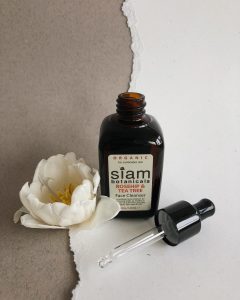
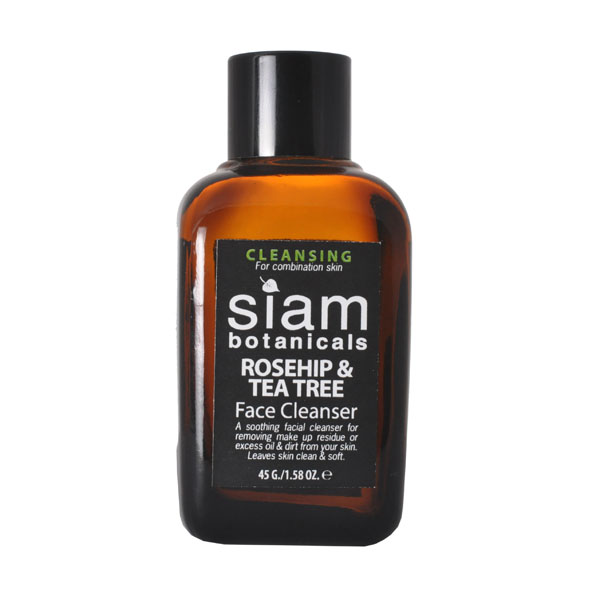
Hydrating and cleansing: Rosehip and Teatree oil cleanser

Do you have drier skin that needs a little more hydration? Try our COSMOS Organic Rosehip and Tea Tree oil cleanser. Rosehip oil is naturally moisturising: blended with olive fruit oil and just the right proportion of Tea Tree oil, this cleanser will gently remove impurities whilst controlling and reducing blemishes thanks to it’s naturally antibacterial properties. Of course when you use either of our oil cleansers you can rest assured that our premium organic ingredients are working with your skin to support its own natural systems.

Why oil cleansing works

The oil cleansing method was the hot topic of conversation in a #tweetchat I recently took part in. To a large extent we were preaching to the converted – the majority of those who joined in with the chat were already big fans – but there were some people who had tried it and felt it wasn’t for them.

Ingredients such as alcohol and harsh synthetic chemicals in mainstream cleansers can actually leave the skin dry and stripped of its natural oils, causing it to over-compensate by producing excess oil, which in turn leads to annoying pimples and blemishes. If this endless cycle of dry and oily skin sounds familiar to you, we would encourage you to give the oil cleansing method a try. Of course, there’s no such thing as a ‘one-size-fits-all’ skin care solution, but oil cleansing can work wonders for any skin type and, when done correctly, will not only remove make-up and draw out pore-clogging dirt and other impurities but also help to balance, moisturize and nourish your skin.

How to oil cleanse

Are you using your oil cleanser correctly? It struck me in the course of the tweetchat that sometimes oil cleansing is rejected not because the product or process is wrong for that person’s skin, but because the user is unknowingly using the wrong technique and so isn’t getting the best out of it. We have some fantastic oil cleansers at Siam Botanicals and we want to be absolutely sure that our customers are getting the most out of them. So here’s the oil cleansing method in four easy steps!

Oil cleansing method - oil cleanser, flannel and hot water

1. Pour a coin-sized amount of oil into the palm of your hand, rub your hands together to warm the oil and then smooth over your face.

2. Massage the oil into your skin with upward movements.According to Jennifer who does Swedish Massage at Greentoes, you should do this for a minute or two at least; longer if you have the time. Linger over this process – it can be very enjoyable!

3. Soak a clean flannel in very hot (NOT scalding!!) water. Wring it out and press it over your face until it cools. This steaming process will remove the oil, bringing any dirt and impurities with it. It feels wonderfully relaxing, too – like a mini spa treatment! Repeat this stage if necessary.

4. Wipe away any remaining oil residue and repeat the whole process again.

Yes, we know it’s almost certainly more time-consuming than the routine you’re used to, but trust us, it’s worth it! You can get away with a single cleanse if you don’t wear make-up, but even then, a little extra time invested in a double cleanse really will pay off. If you establish oil cleansing as part of your regular skin routine, we think you’ll notice a big difference! Your skin will look and feel more hydrated and take on a radiant glow.

We have four great oil cleansers that cater for every skin type:

Oil cleansing: Siam Botanicals Rosehip & Tea Tree Face Cleanser

Thanks to the antibacterial powers of tea tree, our Rosehip & Tea Tree cleanser is great for blemish-prone and problem skin


Oil Cleansing: Siam Botanicals Apricot Face Cleansers are available for dry and oily skin

Our light, easily absorbed Apricot cleansers come in two formulas – for dry skin and for oily skin. They’re very gentle, so are also recommended for sensitive skin types

Alternatively, you can of course create your own oil blends to suit your personal skin requirements – there are plenty of great recipes on the internet to help you with this. If you’re not sure what your skin type is or which oils are likely to work best for you, this really useful article on Wildly Natural Skincare will help you work it out.

What do you think about the oil cleansing method? Is it an essential part of your skin care routine, or do you think it’s nothing more than a fad? We’d love to hear what you have to say about it in the comments below.

Our signature facial

Knowing which products to use, how best to use them and in what order is vital if you are to establish a regular, effective face care routine. Here, we run through our four-step facial (in a nutshell: cleanse, exfoliate, tone, moisturise!) with our product suggestions and some easy-to-follow instructions. It’s all you need for clear, healthy and nourished skin.

STEP 1

Cleanse & Detoxify:
Achieve clear, glowing skin.

Routine: Daily.
Recommended product(s): Rose Hip & Tea Tree Face Cleanser (suitable for all skin types) or Apricot Face Cleanser (available in dry skin or oily skin formulas).

Wipe face gently with a flannel soaked in clean, warm water. Pour a coin-sized amount of oil into the palm of your hand, rub your hands together to warm the oil and then smooth over your face. Massage gently into your skin with firm upward movements. Soak the flannel in hot water (not too hot!) and place over your face until it cools; then wipe away the oil and residue.

 STEP 2

Exfoliate & Polish:
Gently remove dead skin cells and clear pores.

Routine: Twice weekly (once a week may be sufficient for sensitive skin).

Recommended product(s): Argan & Moringa Face Polish (suitable for all skin types).

Apply a small amount to the face and massage into the skin with gentle circular movements. Rinse off with warm water. Soak a flannel in clean, warm water and remove any remaining scrub mixture. Wipe away the oil and residue. Gently pat dry if required.

STEP 3

Tone & Refresh:
Revive and re-balance your skin.

Routine: Daily.

Recommended product: Pure Organic Bulgarian Rose Water (suitable for all skin types).

Shake before use. Gently mist the face (with eyes closed). Allow mist to be absorbed into the surface of the skin for one minute. Gently pat dry if required.

 STEP 4

Moisturise & Nourish:
Give your skin the nutrients and oils it needs to stay clear and healthy.

Routine: Daily.

Recommended product(s): Rudis Oleum Replenish Formula or Rudis Oleum Repair Formula.

Place a small amount of serum in the palm of one hand and use the fingertips of your other hand to massage the oil into the skin, starting at the chin and moving in small circles until you reach the cheeks, the area around the eyes, and the forehead.